
If you’re starting your trading journey, understanding trading terminology is your first step toward mastering the markets. Whether you’re trading forex, stocks, crypto, or commodities, knowing the language of trading can help you:
• Read charts accurately
• Follow strategy tutorials
• Avoid rookie mistakes
• Stay calm under pressure
This in-depth guide includes 50+ must-know trading terms broken down into categories like order types, technical analysis, strategy, and trader slang. Every term includes real-world examples, beginner-friendly definitions, and optimized SEO phrases to help you rank in search engines and understand trading like a pro.
SEO Keywords This Article Targets:
• Trading terms for beginners
• Forex glossary with examples
• Crypto trading vocabulary
• Stock market terminology
• Best trading strategies for beginners
Let’s dive in — and don’t forget to bookmark this page for quick reference later.

Beginner Trading Glossary (Terms 1–10)
- Market Order
A market order is an instruction to buy or sell an asset at the best available current price. It’s executed instantly and is ideal when you prioritize speed over price.
✅ Example: You click “Buy” on EUR/USD in your trading app. Your broker instantly executes the order at the nearest available price — this could be slightly higher or lower depending on market volatility.
📌 Why It Matters: Market orders are simple, fast, and best used in highly liquid markets where slippage is minimal.
- Limit Order
A limit order allows you to specify the exact price at which you want to enter or exit a trade. It executes only if the market reaches your chosen price or better.
✅ Example: You set a buy limit order for Apple stock at $150. The order will only be filled if the stock drops to $150 or lower — not before.
📌 Why It Matters: Gives you price control, especially useful in volatile or low-liquidity conditions.
- Stop-Loss (SL)
A stop-loss order automatically exits your trade when the price moves against you by a predefined amount. It’s your safety net against excessive loss.
✅ Example: You buy gold at $1900 with a stop-loss set at $1880. If the price falls to $1880, your broker closes the trade, capping your loss.
📌 Why It Matters: Protects your trading capital and helps manage risk systematically.
- Take Profit (TP)
A take-profit order automatically closes your trade when it hits a target profit level. This helps you lock in gains without needing to monitor the market.
✅ Example: You buy EUR/USD at 1.1000 with a TP at 1.1100. When price hits 1.1100, your trade closes automatically with profit.
📌 Why It Matters: Encourages disciplined trading and removes emotional exits.
- Bid & Ask Price
• Bid Price: The highest price a buyer is willing to pay for an asset.
• Ask Price: The lowest price a seller is willing to accept.
✅ Example: EUR/USD shows Bid = 1.1050 and Ask = 1.1052. You can sell at the bid or buy at the ask.
📌 Why It Matters: The difference between these two (called the spread) affects your trade costs.
- Spread
The spread is the difference between the bid and ask price. It represents a cost to the trader and profit to the broker.
✅ Example: Bid = 1.1050, Ask = 1.1053 → Spread = 3 pips
📌 Why It Matters: Tighter spreads mean lower trading costs, especially important for scalpers and day traders.
- Liquidity
Liquidity refers to how quickly and easily you can buy or sell an asset without affecting its price. High liquidity means fast execution and tighter spreads.
✅ High Liquidity Examples: EUR/USD, Bitcoin, S&P 500 stocks
✅ Low Liquidity Examples: Penny stocks, obscure altcoins
📌 Why It Matters: Liquid markets are more efficient and less volatile under normal conditions.
- Slippage
Slippage occurs when your order is executed at a different price than expected, usually during fast market moves or low liquidity conditions.
✅ Example: You set a market order to buy at $50, but due to slippage, it’s filled at $50.20.
📌 Why It Matters: Can lead to unexpected losses, especially with large positions or news events.
- Volatility
Volatility measures how rapidly an asset’s price moves. It reflects market uncertainty and potential opportunity.
✅ Measured by: ATR (Average True Range), Bollinger Bands
✅ High Volatility: Crypto, oil, tech stocks
📌 Why It Matters: Volatility affects risk, strategy choice, and position sizing.
- Pip
A pip (short for “percentage in point”) is the smallest price movement in most forex pairs. Usually equal to 0.0001 for major pairs.
✅ Example: EUR/USD moves from 1.1000 to 1.1001 → 1 pip movement
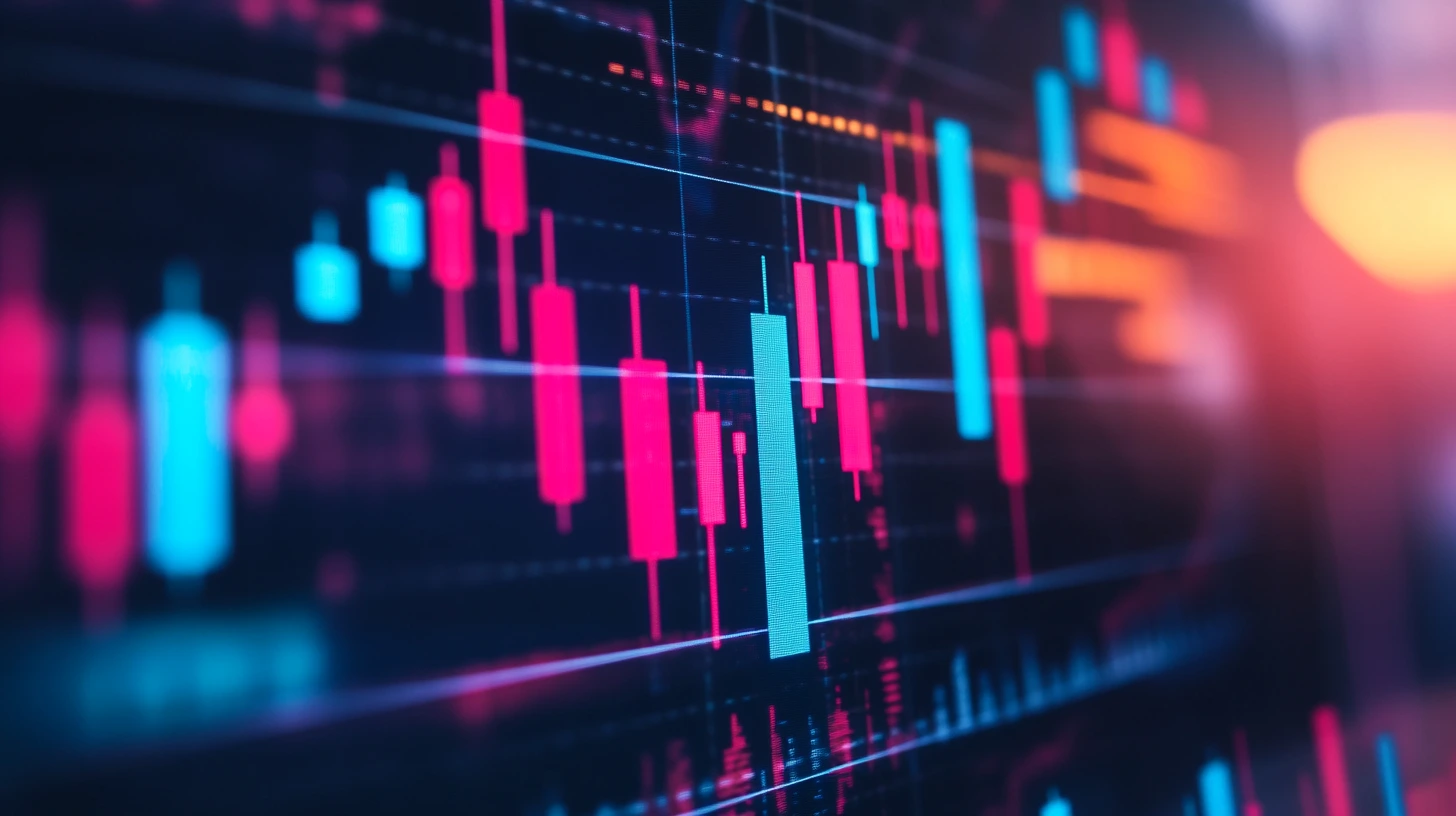
📌 Why It Matters: Used to calculate profit, loss, and spread in forex trading. - Candlestick
A candlestick is a type of price chart used in technical analysis that displays the high, low, open, and close prices of an asset for a specific time period. Each candle shows a story of market sentiment during that time frame.
✅ Example: A green (bullish) candle means the price closed higher than it opened. A red (bearish) candle means it closed lower.
📌 Why It Matters: Helps traders identify patterns, reversals, and trend strength at a glance.
- Support and Resistance
• Support: A price level where buying interest is strong enough to prevent the price from falling further.
• Resistance: A level where selling interest is strong enough to stop the price from rising further.
✅ Example: Bitcoin bouncing repeatedly off $30,000 support indicates buyer strength at that level.
📌 Why It Matters: Helps traders set entry, exit, and stop-loss levels.
- Moving Average (SMA/EMA)
A moving average smooths out price data by creating a constantly updated average price over a specific period.
• SMA (Simple Moving Average): A straightforward average.
• EMA (Exponential Moving Average): Gives more weight to recent prices.
✅ Example: A 50 EMA reacts faster to price changes than a 50 SMA.
📌 Why It Matters: Used to identify trends and dynamic support/resistance.
- RSI (Relative Strength Index)
The RSI is a momentum oscillator that measures the speed and change of price movements, ranging from 0 to 100.
✅ Overbought: RSI > 70 ✅ Oversold: RSI < 30
📌 Why It Matters: Signals potential reversals and trend strength.
- MACD (Moving Average Convergence Divergence)
MACD is a trend-following indicator showing the relationship between two EMAs — often the 12- and 26-period.
✅ Buy Signal: MACD line crosses above signal line ✅ Sell Signal: MACD line crosses below signal line
📌 Why It Matters: Combines trend direction and momentum in one tool.
- Breakout
A breakout occurs when the price moves outside a defined support/resistance level or pattern, often followed by strong momentum.
✅ Example: Price breaking above a long-term resistance may signal the start of a new bullish trend.
📌 Why It Matters: Can signal trade entries with high reward potential.
- Pullback
A pullback is a temporary reversal in the direction of a prevailing trend. It’s a pause or minor dip before the trend continues.
✅ Example: In an uptrend, a price dip back to the 50 EMA may be a buying opportunity.
📌 Why It Matters: Offers better entry prices within a trend.
- Divergence
Divergence happens when the price of an asset is moving in the opposite direction of an indicator, such as RSI or MACD.
✅ Bullish Divergence: Price makes lower lows while RSI makes higher lows. ✅ Bearish Divergence: Price makes higher highs while indicator makes lower highs.
📌 Why It Matters: Often signals weakening trends or reversals.
- Volume
Volume measures how much of an asset was traded over a given period. It reflects market participation.
✅ High Volume: Confirms strength of a price move. ✅ Low Volume: Suggests a lack of interest or possible reversal.
📌 Why It Matters: High volume often confirms breakouts, trends, or reversals.
- Chart Patterns
Chart patterns are visual formations on price charts that signal future price movements. They are the foundation of classical technical analysis.
✅ Common Patterns: Head & Shoulders, Double Top, Triangles, Flags
📌 Why It Matters: Help traders predict breakouts, reversals, and continuation setups. - Entry Point
The entry point is the exact price or moment you open a trade. It can be based on signals from a trading strategy, chart patterns, or technical indicators.
✅ Example: A trader might choose to enter a long position when price breaks above a resistance level or a moving average crossover occurs.
📌 Why It Matters: A well-timed entry improves risk-to-reward ratio and trade success.
- Exit Point
The exit point is the price or condition at which you close a trade. It can be planned (take-profit) or reactive (stop-loss).
✅ Example: A trader might exit when a reversal pattern appears or an indicator like RSI becomes overbought.
📌 Why It Matters: Proper exits help secure profits and limit losses.
- Position Size
Position size refers to the number of units or lots you trade in a single position. It directly affects your risk exposure.
✅ Formula: Position Size = Account Risk ÷ Stop Loss in Pips × Pip Value
📌 Why It Matters: Right position sizing keeps losses within your risk tolerance.
- Leverage
Leverage allows traders to control a large position with a smaller amount of capital. Expressed as a ratio (e.g., 10:1, 100:1).
✅ Example: With 100:1 leverage, $1,000 can control a $100,000 trade.
📌 Why It Matters: Increases potential profit and potential risk. Must be used carefully.
- Margin
Margin is the minimum amount of money required in your account to open a leveraged trade.
✅ Example: To open a $10,000 position with 50:1 leverage, you need $200 margin.
📌 Why It Matters: If your equity drops below margin requirement, you may face a margin call.
- Margin Call
A margin call occurs when your account equity falls below the required maintenance margin. Your broker may request more funds or automatically close positions.
✅ Example: If your trade goes against you and equity drops, you’ll get a warning or forced liquidation.
📌 Why It Matters: Prevents the account from going negative, but can lead to unexpected losses.
- Commission
Commissions are fees charged by brokers for executing your trades. Some brokers offer zero-commission trading but compensate via wider spreads.
✅ Types: Per trade, per lot, or as a fixed fee
📌 Why It Matters: Impacts your cost per trade — especially for scalpers and high-frequency traders.
- Swap / Overnight Fee
A swap or overnight fee is the interest charged or earned for holding a trade overnight, based on the interest rate differential between currencies.
✅ Positive Swap: You earn money ✅ Negative Swap: You pay to hold
📌 Why It Matters: Can impact long-term trades and strategies like carry trading.
- Execution Speed
Execution speed is the time it takes for your broker to fill an order once you place it. High-speed execution ensures you get the price you expect.
✅ Fast Execution: Crucial in fast-moving or news-driven markets.
📌 Why It Matters: Slow execution increases slippage risk.
- Slippage Tolerance
Slippage tolerance defines how much price deviation you are willing to accept when your trade executes, especially in volatile markets.
✅ Example: A 0.5% slippage setting means your trade can fill at a price within 0.5% of your intended entry.
📌 Why It Matters: Helps control execution risk during high volatility events. - Trading Plan
A trading plan is a structured guide that outlines your trading goals, strategies, risk management rules, and execution process. It acts as your business plan for trading.
✅ Includes: Entry/exit rules, risk per trade, trading hours, asset focus, journaling practices.
📌 Why It Matters: Keeps you disciplined, consistent, and accountable — especially during losses.
- Trading Strategy
A trading strategy is a predefined method for identifying and executing trades based on market analysis. It could be based on technical, fundamental, or algorithmic signals.
✅ Examples: Breakout strategy, mean reversion, swing trading, scalping.
📌 Why It Matters: A clear strategy reduces emotional decisions and creates repeatable setups.
- Risk-to-Reward Ratio (R:R)
The risk-to-reward ratio compares the potential loss (risk) to the expected gain (reward) on a trade.
✅ Example: If risking $50 to make $150, your R:R = 1:3
📌 Why It Matters: Favorable R:R improves long-term profitability even with a low win rate.
- Win Rate
Your win rate is the percentage of trades you win out of the total taken.
✅ Example: Winning 55 out of 100 trades = 55% win rate
📌 Why It Matters: Helps you assess the effectiveness of your strategy and its compatibility with your R:R.
- Drawdown
Drawdown refers to the percentage loss from your peak equity to a trough during a losing streak.
✅ Example: Your account falls from $10,000 to $8,000 = 20% drawdown
📌 Why It Matters: Large drawdowns are hard to recover from and impact your psychology.
- Risk Management
Risk management is the practice of controlling losses and protecting capital. It includes setting stop-losses, limiting position size, and using proper R:R.
✅ Example: Only risking 1% of your account per trade ensures long-term survival.
📌 Why It Matters: No system can guarantee wins, but good risk management ensures you stay in the game.
- Backtesting
Backtesting is testing your strategy using historical data to see how it would have performed in the past.
✅ Example: Running your breakout setup on past EUR/USD data to see win rate and average return.
📌 Why It Matters: Validates your system before risking real money.
- Forward Testing
Forward testing (or paper trading) is testing your strategy in real-time market conditions without risking real money.
✅ Tools: Demo accounts, trading simulators
📌 Why It Matters: Helps test execution, timing, and emotional discipline.
- Trading Journal
A trading journal is where you log each trade’s entry, exit, reasoning, emotion, outcome, and lessons learned.
✅ Fields to Include: Setup, timeframe, stop-loss, take-profit, outcome, mistake/lesson
📌 Why It Matters: Reveals patterns in your behavior and helps fine-tune your system.
- Emotional Discipline
Emotional discipline is your ability to follow your plan, stay calm during volatility, and avoid revenge trading or overtrading.
✅ Example: Stopping for the day after hitting your loss limit instead of trying to win it back.
📌 Why It Matters: Mastering emotions is often more important than mastering the charts.
Trader Slang & Culture (Terms 41–50) - FOMO (Fear of Missing Out)
FOMO is the emotional urge to enter a trade because others are profiting or price is moving fast — even when there’s no solid setup.
✅ Example: Jumping into Bitcoin just because it’s spiking, without a strategy.
📌 Why It Matters: FOMO leads to impulsive decisions and poor risk management.
- HODL
Originally a typo for “hold,” HODL became a crypto meme meaning to hold onto an asset long-term regardless of price swings.
✅ Example: “I’m HODLing my Ethereum until 2030.”
📌 Why It Matters: Reflects long-term investor mindset in volatile markets.
- Bag Holder
A bag holder is someone stuck holding a losing position, often after a major price drop.
✅ Example: Buying a stock at $100 and still holding after it crashes to $20.
📌 Why It Matters: Highlights the risks of not using stop-losses.
- Pump and Dump
A pump and dump is when a group hypes an asset to inflate its price (pump), then sells off suddenly (dump), leaving late buyers at a loss.
✅ Example: Common in low-cap crypto or penny stocks.
📌 Why It Matters: Watch out for unrealistic gains and always do your own research.
- Whale
A whale is a trader or institution with enough capital to move the market significantly.
✅ Example: When a whale buys $10M in Bitcoin, price can spike.
📌 Why It Matters: Whale moves can create fake breakouts or shakeouts.
- Paper Hands
A trader with paper hands exits too early due to fear, even if the trade is still valid.
✅ Opposite: “Diamond hands” — holding strong through volatility.
📌 Why It Matters: Managing fear is essential to sticking with your plan.
- Overtrading
Overtrading is taking too many trades, often emotionally or without solid setups, leading to burnout or loss.
✅ Example: Taking 10 random trades in a day just to ‘make back’ a loss.
📌 Why It Matters: Reduces accuracy and increases risk.
- Revenge Trading
Revenge trading is trying to recover a loss quickly by taking impulsive, high-risk trades.
✅ Example: Doubling your next position right after a big loss.
📌 Why It Matters: Emotion-based decisions usually worsen losses.
- Going Long vs. Short
• Long: Buying in expectation price will rise.
• Short: Selling (even borrowed assets) expecting price will fall.
✅ Example: Going long on gold at $1800, or shorting Tesla at $250.
📌 Why It Matters: Core concept behind any directional trade.
- “The Trend Is Your Friend”
A classic trading mantra that reminds traders to trade with the trend, not against it.
✅ Example: In an uptrend, only look for buy setups.
📌 Why It Matters: Counter-trend trading requires more skill and tighter risk control.
If you’re just starting your trading journey, it’s helpful to explore foundational resources that build your understanding. Be sure to check out our internal guide on Introduction to Financial Markets, which explains how stocks, forex, commodities, and crypto interact in real-time. For strategy-focused learning, we also recommend reading How to Build Your First Trading Strategy, which complements the terminology covered here. Additionally, for external references, the Investopedia Trading Glossary offers in-depth financial definitions. These resources will deepen your knowledge and support you in becoming a confident, well-informed trader.
🧠 Final Thoughts
Mastering trading terminology is not just about memorizing definitions—it’s about building the mental toolkit required to survive and thrive in the markets. Every concept you’ve just read, from stop-loss to FOMO, plays a role in shaping how you analyze, act, and adapt as a trader. By understanding the language of trading, you give yourself an edge: you’ll recognize key patterns faster, avoid beginner traps, and make more disciplined decisions under pressure. This glossary isn’t a one-time read—it’s a resource to revisit often as you grow.
The best traders didn’t become successful by chance; they mastered the basics, built strong foundations, and stayed committed to constant learning. Let this article be your first step toward that journey. Save it, study it, and apply it—because in trading, knowledge really is power.
Trading Terminology, Trading Terminology, Trading Terminology, Trading Terminology, Trading Terminology, Trading Terminology,
Trading Terminology, Trading Terminology, Trading Terminology, Trading Terminology, Trading Terminology, Trading Terminology, Trading Terminology, Trading Terminology, Trading Terminology, Trading Terminology, Trading Terminology, Trading Terminology, Trading Terminology, Trading Terminology, Trading Terminology, Trading Terminology, Trading Terminology, , Trading Terminology, Trading Terminology, Trading Terminology, Trading Terminology, Trading Terminology, Trading Terminology